
Tuesday, 8 December 2009
Gundam Legs
To make the leg I created a close spline then used the extrusion modifier, I inset the top polygon then extruded it out, then chamfered the edges. I also inset the bottom polygons in the arch then inset them inwards. i then slightly chamfered the edges of the thicker leg area.

I then created a chamfer box, this a box with smoothed corners and edges, I then used soft selection and pulled some of the vertices out. This created a more speherical object.

I then went on to create the knee ornament, to do this i cut segments into the front polygons then extruded from these nowly cut polygons. I then used vertices selection to aligned sections with the blueprint behind.

I extruded the bottom set of polygons out to crate the bottom of the leg then dited vertices to get the right shape.

I then created a notch section at the bottom of the foot with extrude to act as the joint to the foot.

I then started to create the foot, i did this the same way as both the shoulder pad and upper leg section. I created 2 closed splines, one for the ankle and one for the frontal foot, i then extruded these to create a base.

I then inset the top polygons, and extruded them upwards, i edited the vertices to get the right shape from the blueprint.

I copied the cog objects I made earlier and dragged them down to the foot. I also created a guard over the top of the foot to do this i create a thin box then extruded the top setion out. I then mirrored the object to created a full guard.

The leg is now complete

Gundam Arms
The first thing i did was created a closed spline for the front outline of the shoulder pad, a spline is basically a line tool. I then used the extrusion modifier on the closed spline to create a flat panel. I then extrude this out to create a thick panel, then inset the front polygon and pulled it out slightly to get a better shape. I then extruded the upper back polygons out and applied the symmetry modifiers. I converted this shape into an editble to create one object. I then inset and extruded a section on the shoulder pad. I then created the handle in the shoulder, i created a spline in the shape i wanted then i created a circle spline next to it. I selcted my shapeded spline then went to the compound objects menu and selected loft, then selected get shape, i then clicked on the circle I had made. This created a cylinder around my spline.

I now started to make the top section of the arm, this was two simple box primitive's, the lower one was divided into 3 sections.

I then chamfered the top section of the top box, and extrude 2 sections out of the bottom box. then i chamfered the botttom part of these 2 sections.

I then created cog like objects that surrounded the joints, to do this made some thin cylinders. I inset the cylinders then raised the inset polygon. I cut 2 lines across the middle of the cylinder to make 2 semicircles either side, and extruded these cirles in and that was the cogs made.

I then made a smaller box for the lower parts of the arm.

Then using the same method i used for the shoulder pad, i created the forearm. this was a combination of splines and extrusion.


I created the hand by making asimple box primitive and extruding sections to create the shape then edited the vertices to be more precise. The fingers were a set of smller boxes with notches sticking out the back, these notches acted as joints. I arranges the finger sections in to the right positions, i used a flat hand positions unlike the blueprint, this was to help with applying a biped to the gundam.


I then arranged the arm togetehr and attached cartain parts together, below is the final arm.

Gundam Body
I started to make the body by creating a box primitive, and then extrude the from polygons and top polygons. I edited the vertices to match the blue print shape at the back. I then beveled the bottom polygons to create layers for the lower torso. I selected some of the frontal polygons and extruded them out, then aligned the vertices with the blue print. I used the uniform scale to shrink the extruded polygons of the newly extruded section, then inset the polygons and extruded them back to create a cavity.
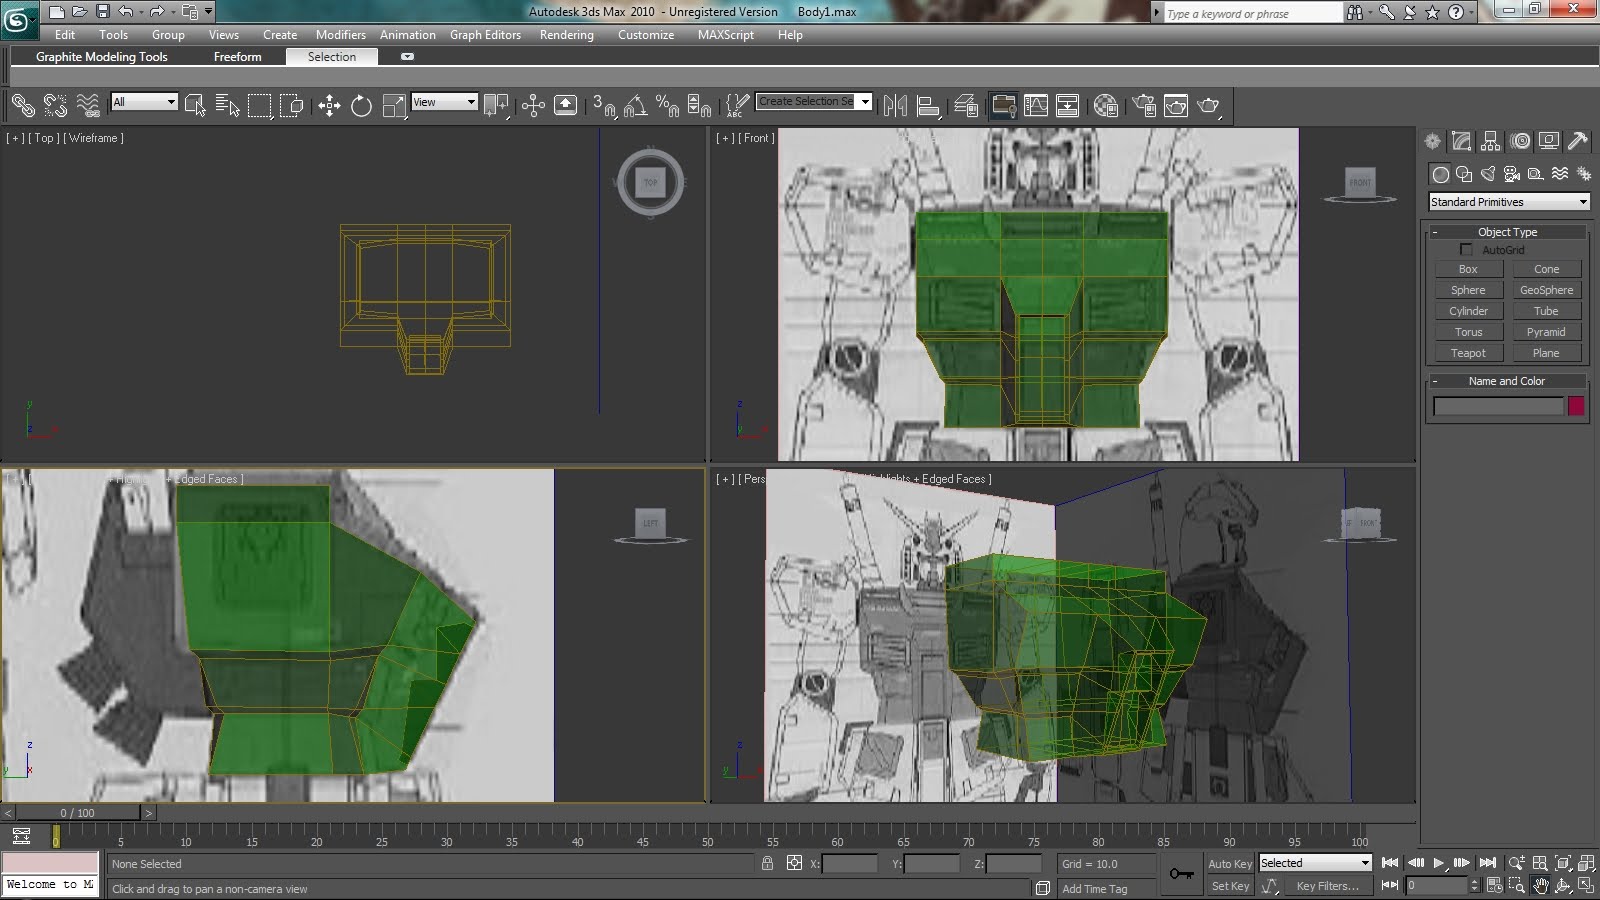
I then created a raised area around the neck this was again a simple extrusion of the polygon around the neck area. I also created cavities in the breast plate using inset and extrusion.


Next I created the grates inside the newly made cavities. To do this i detached the polygon in the cavity as a separate element. I used a slight inset then cut lines across the inset polygon using the connect tool, the connect tool allows you to select 2 or more line and create a new line between them. I then selected the out polygons and the several of the inner polygons and extruded them forward to create a grate, then attached it back to the main body.


I next created the hip section to do this i selected the center polygon from the bottom of the upper body, then i extruded the polygon twice, one small extrusion then one big one. I then selected he front and the back polygons of the hip section and made 2 more extrusion, i then edited the vertices to match the blue print. I then selected the front hip polygons, I inset and extruded the polygons to create another cavity.


I then created the hip panels, I created a flat box primitive then edited to vertices to get the right shaped. I created another smaller box primitive a tilted it slight lightly, i beveled the edges and shrunk the front polygon. I attached this to the hip panel.


I created clones of these hip plates and mirrored them to create the 4 panels, i also made some side plates in the same way.


I hid the body i had created to work on the backpack, The backpack was incredibly simple to make, i created a box primitive then used extrusion modelling to get the basic shape. i then edited the vertices to match the blueprint. I then created the thruster cones, to do this i create cylinders then using the uniform scale tool, expanded one end to create the cone, then cloned the cone. To create the antenna on the back pack, i made longer cylinders, then used the uniform scale tool on the vertices near the top the create the shape. I cloned the antenna and slightly tilted them different ways. i attached all these different components to finish the back pack.


I unhid all the components and attached the backpack the the torso to finish the body. below are are wireframe and redered version of the body.


Gundam Head
This is my second tutorial, I choose to do this particular tutorial due to its difficulty level ( everyone likes a challenge) and it was based around character modelling.
To start i created a simple plane and positioned it in front of the head, i then converted it into an editable poly and deleted one half of the polygons. I then added the symmetry modifier to the remaining polygons and reflected it across the x axis. I then began to move vertices, using the left and front view ports to start to create a 3D mask. I then used line selection and shift+drag to create polygons to work with.

As I got the the outer sides of the helmet, more detail was needed, I used a combination of extrude and inset to create the outer parts of the helmet.

I then created a chamfer box for the main part of the helmet, i turned the chamfer box into an editable poly and deleted sections of polygons. I then attached the chamfer box to the mask i had previously made to create one object. To fill in the gaps between the box and the mask used the create geometry function and create polygons in the space between them.

I know began work on the details of the helmet, to do this selected polygons around the helmet and extruded them out, i also used the soft selection feature. Soft selection creates a smoother looking extrusion by auto selecting the polygons around the are you have chosen and extruding them out at different strengths depending on you soft selection settings. I then used inset and extrusion again to create the indents in the side of the helmet.

I then deleted half of the mask and reapplied the symmetry modifier.

I used the line selection and shift+drag to fill in gap at the top of the helmet, then converted this to an editable poly to created one complete object. I then selected the polygons at the front upper part of the helmet and puled them forward.

I selected the some polygons along the top part of the helmet and extrude them up, I shrunk the top polygons to slant the new section downwards, then beveled the edges. I then selected the front polygons of this sections, I inset the polygons then extruded them inwards.

I then created the ornament on the front of the helmet to do this i cut a pentagon shape in the front of the helmet, selected the newly cut polygons out and used the uniform scale tool to shrink the upper polygons. I then cut triangles into the 2 sides of the pentagon extrusion, i extruded these triangle polygons out and pulled the polygons backwards and up, then using the uniform scale tool shrunk the polygons to create points to make the spikes on the helmet.

I yet again deleted half the polygons, i than created a small cylinder to form the flash lights in the upper part of the helmet. I used the boolean option to create a space in the helmet to put the flashlight. The boolean option allows you to deleted a specific are from an objects, by placing an object in the area and removing that object from it. I then selected the outer lines of the deleted area and shift+dragged them back to create a tunnels then placed a newly created cylinder in the whole and attached it to the helmet object. I also created the chin section on thew lower part of the helmet with a simple extrusion.

I then re-applied the symmetry modifier and had a completed helmet, below are the wire frame and rendered versions.


I dealt with possible technical issues for my gundam in a similiar way to my first building, but I had be be alot more regular with my saves because this tutorial was alot more difficult. Instead of waiting to completely finish the head to make copies in different loction i did this when i reached a half way point in the tutorial, this was because alot more work had to put into even get halfway through this tutorial compared to the building.
I ended up going back to early saves many times during this tutorial so having back up files was incredibly difficult.
I used this process for the rest of my gundam modelling, this includes the legs, arms and torso.
Subscribe to:
Comments (Atom)